Author Archives: The Maque

Simply Delish Deep Fried Chicken Fillet with Home Made Tomato Sauce

IMG_20160806_164548_HDR-01

Hi bloggies in the entire blogosphere who stumbled on my page. Welcome!

Well, even though i have not been posting any recipe on this blog, i do actually cook and bake almost every-gewd-d*mn-day. I’m just too lazy to take picts, edit them, write and post it. Particularly in the photo production department, i mostly forgot to take the final product picture. Dunno why. Always in that d*mn part!

Anywayssss,
Today i just feel like updating this blog. Not really planning what to cook beforehand tho. I just went to check what’s available in my fridge. There are chicken fillet and some big juicy tomatoes. It didn’t take too long before finally i decided to cook Deep Fried Chicken Fillet with House Made Tomato Sauce. Simply delish!

So, without further a do. Here’s the recipe:

D E E P  F R I E D  C H I C K E N  F I L L E T

IMG_20160806_152007_HDR-01

INGREDIENTS

  • 1 kg of Chicken Fillet
  • 2 cloves of Garlic
  • 2 large Eggs

DRY INGREDIENTS

  • 5 tablespoons of All Purpose Flour
  • 5 tablespoons of Maize / Corn Starch
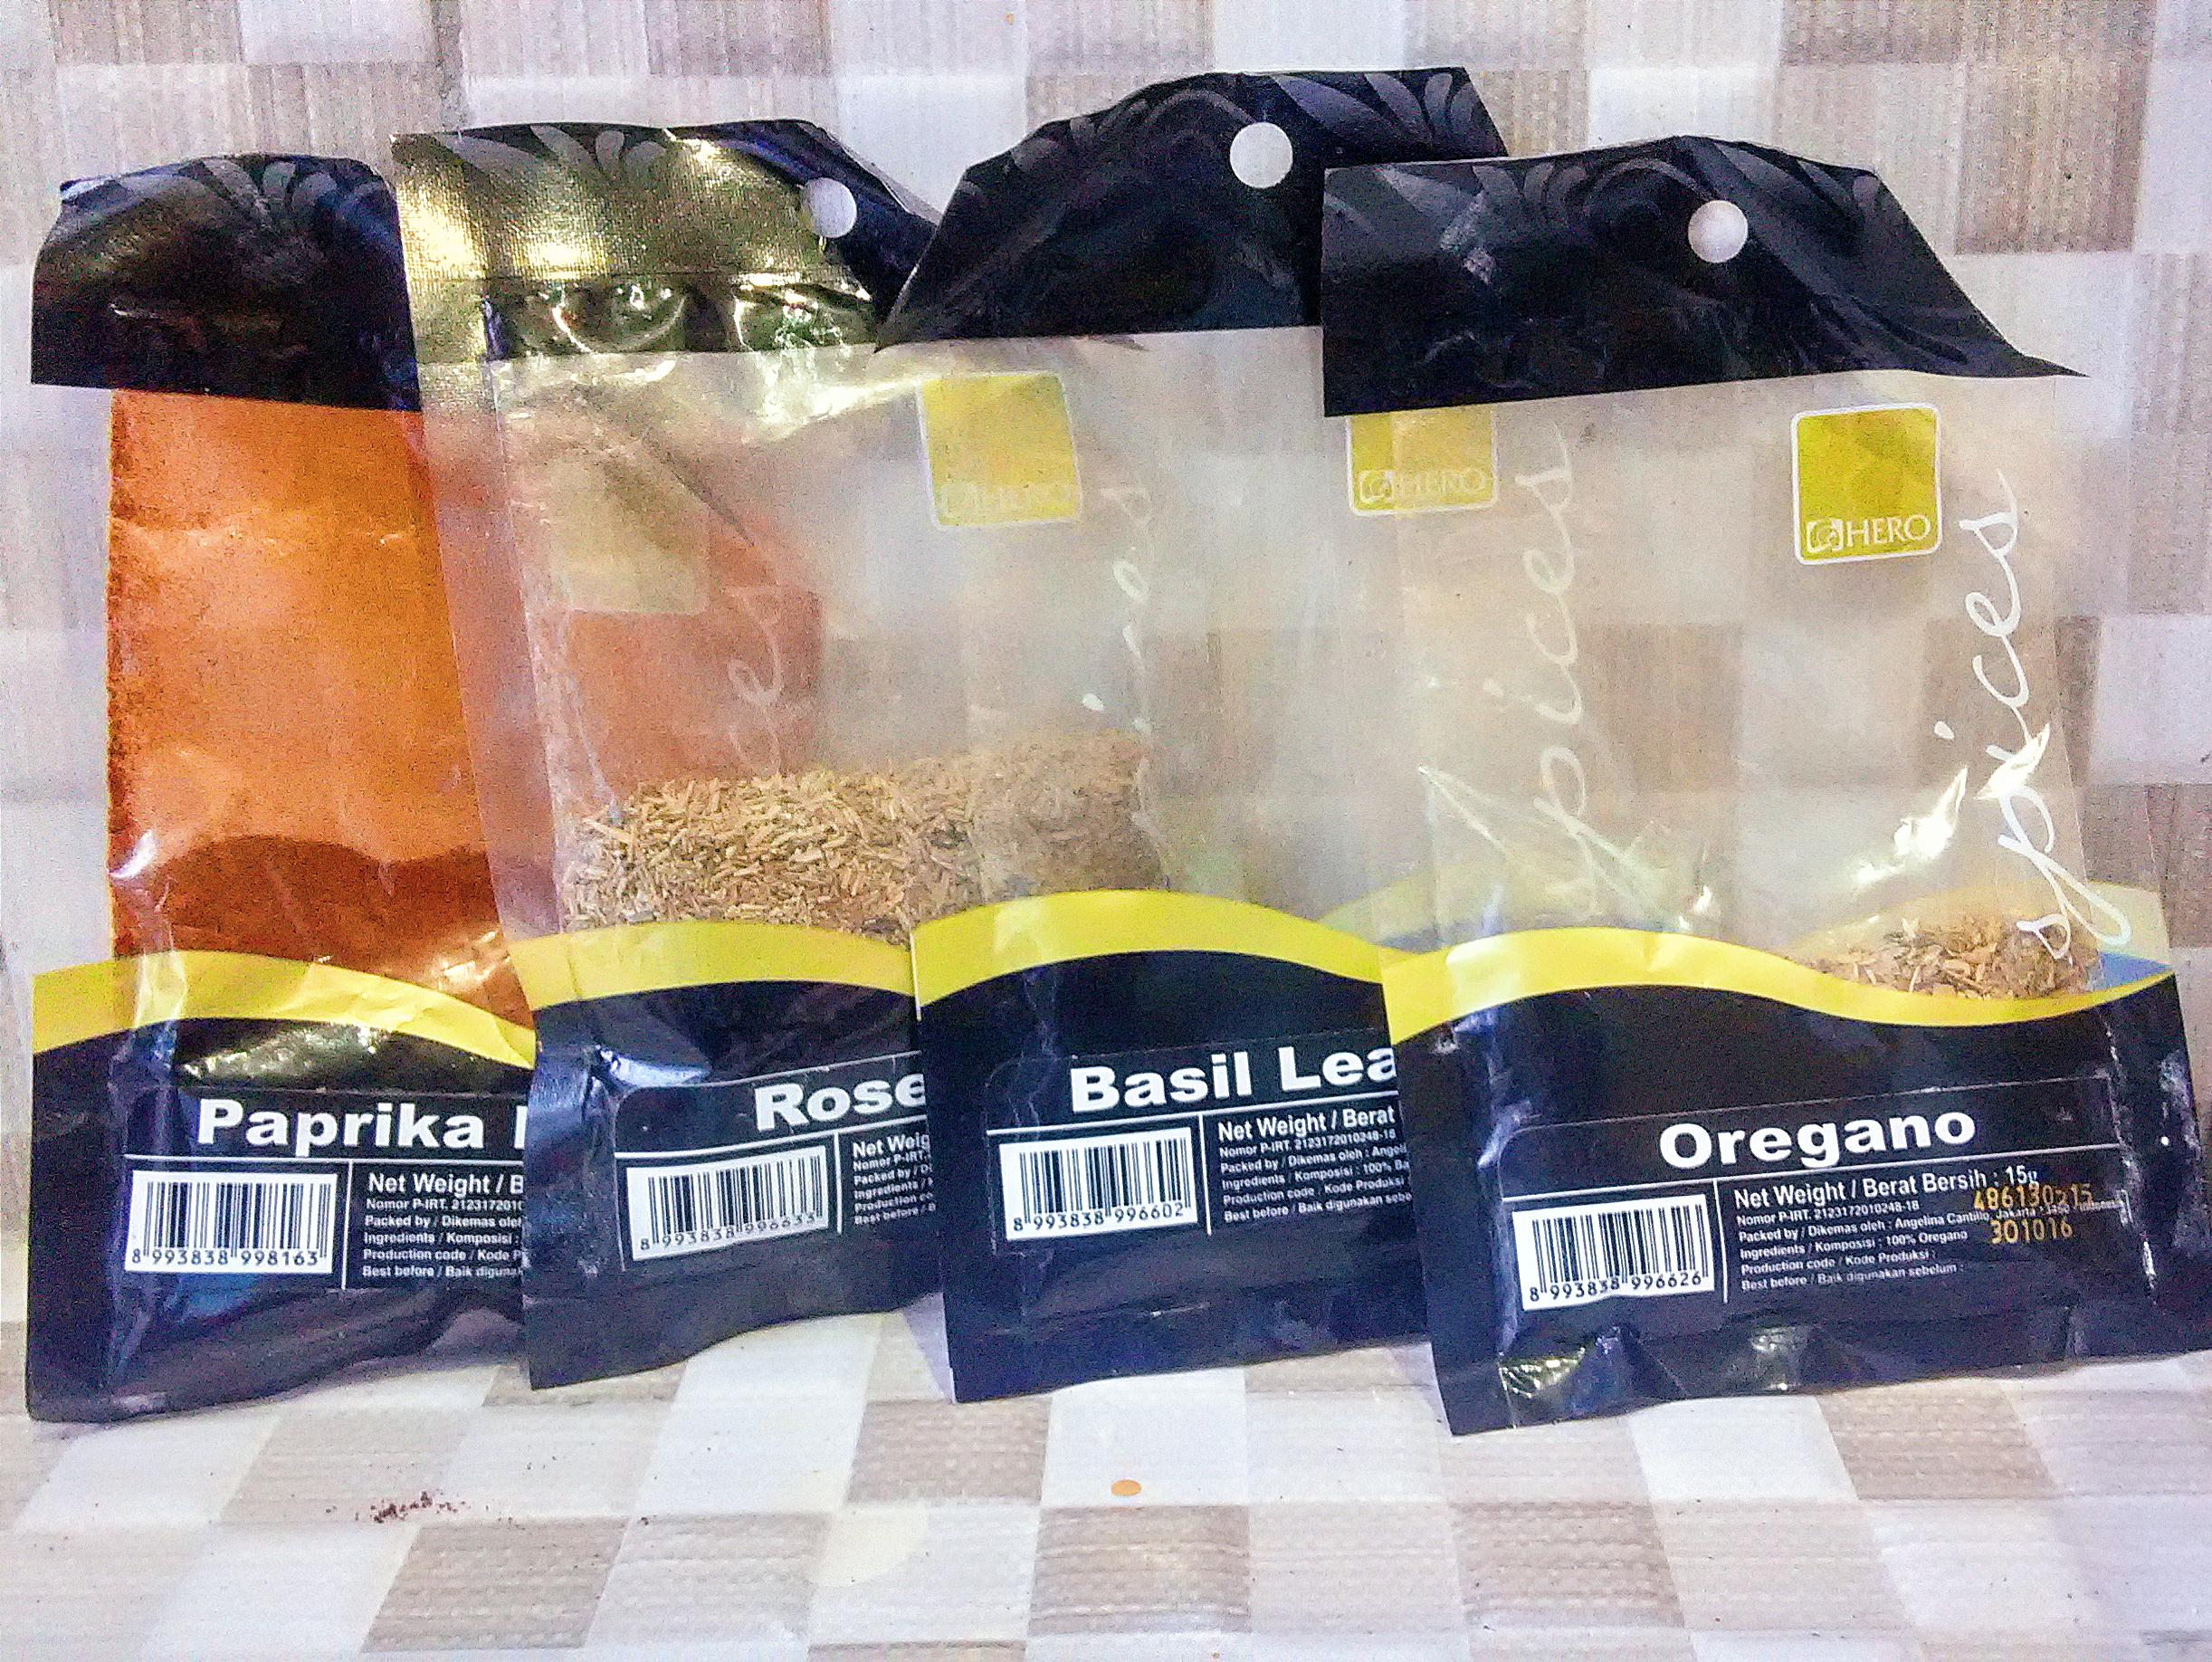
  • 1/2 teaspoon of Dried Rosemary
  • 1/2 teaspoon of Dried Oregano
  • 1/2 teaspoon of Paprika Powder
  • 1 teaspoon of White Pepper
  • 1/3 teaspoon of Salt

*Actually i didn’t do the exact measurements. Simply just eyeball everything and basically you can adjust it based on your liking.

Collage 2016-08-06 18_53_26-01


DIRECTIONS

  • Finely grate the garlic and rub it onto the chicken fillet. Let it sit for several minutes.
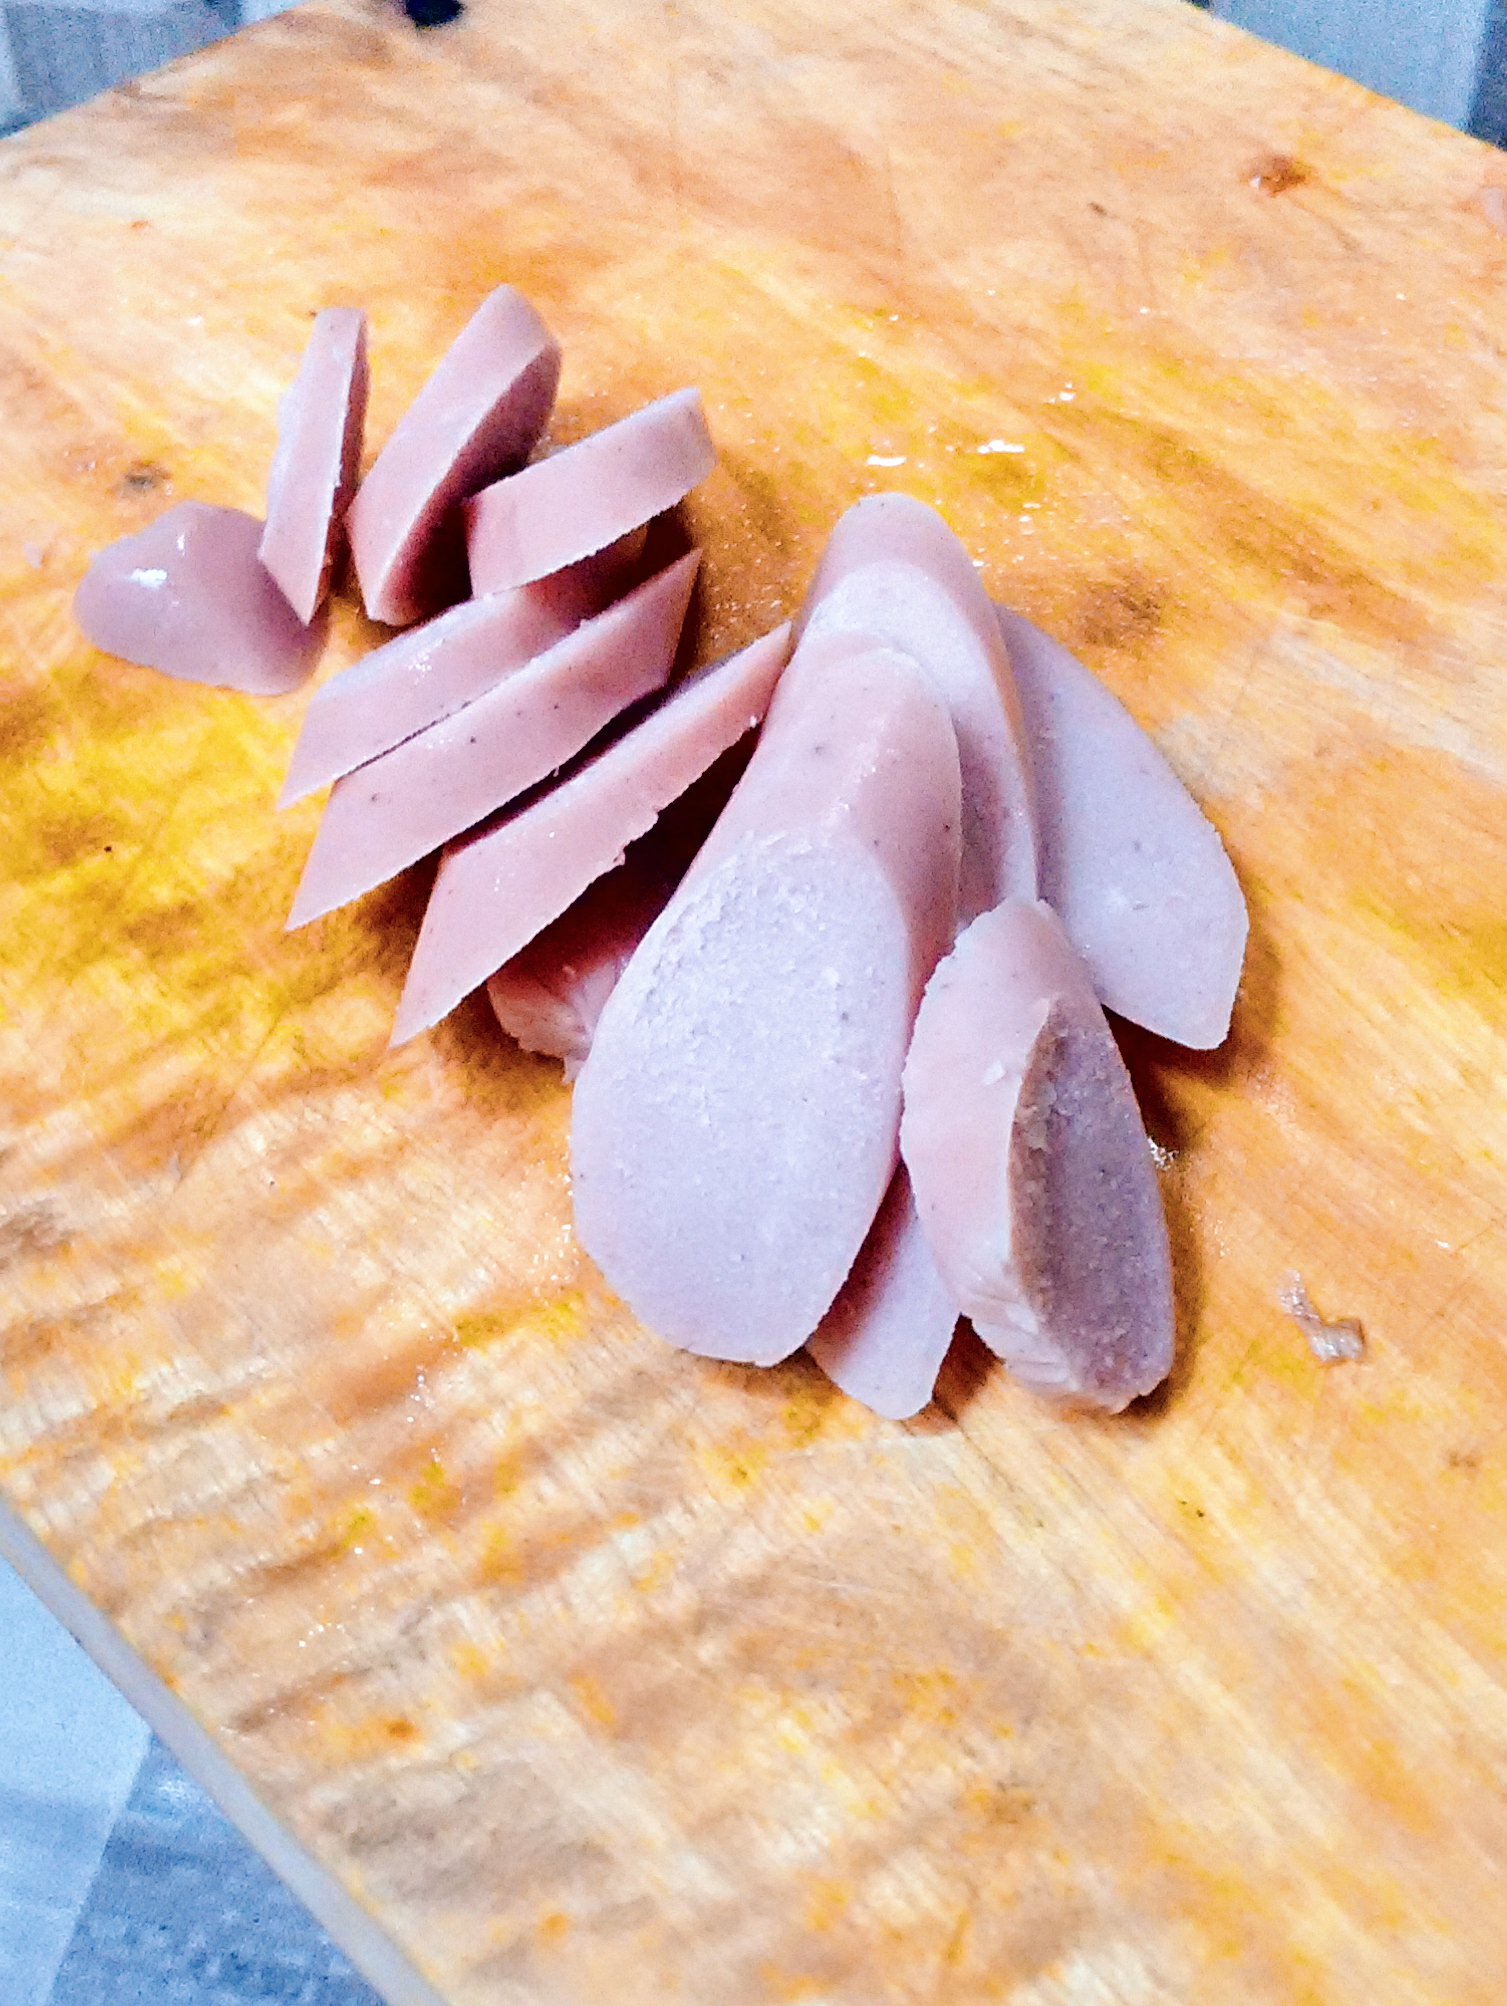
  • Slice or cut the chicken to your preferred size, thickness and shape. For me personally, i like to slice it diagonally.
  • In a Plate #1, blend together all purpose flour, a lil bit salt, dried rosemary and oregano.
  • Crack the egg into a bowl and loosely beat it.
  • In a Plate #2, blend in the corn starch, paprika powder, white pepper and a lil bit salt.
  • Lightly flour the sliced chicken with the flour mixture in Plate #1.
  • Dip in the lightly floured chicken into the egg.
  • Pick the chicken out of the egg wash and toss it into the Plate #2. Make sure that the chicken is well coated in the flour mixture then shake off the excess with strainer.
  • Fry the chicken in hot oil until golden brown and cooked perfectly. Didn’t take long since i thinly sliced it.

H O M E M A D E  T O M A T O  S A U C E

IMG_20160806_185558_HDR-01

INGREDIENTS

  • 3 large Tomatoes
  • 1 bulb of Small Onion
  • 3 cloves of Garlic
  • 1 teaspoon of Sugar (to taste)
  • 1/2 teaspoon of Salt (to taste)
  • 1/3 teaspoon of White Pepper (to taste)
  • 1/3 teaspoon of Dried Oregano (optional)
  • 1/3 teaspoon of Dried Rosemary (optional)
  • 1/2 teaspoon of Paprika Powder (optional)
  • 1/2 teaspoon of Corn Starch (dissolved in 1 tablespoon of luke warm water – acting as the thickening agent)

Collage 2016-08-06 19_01_15-01

DIRECTIONS

  • Finely chop garlic and onion. Cut all the tomatoes into chunks. Put it in the food processor along with chopped garkic and onion. Blend them well.
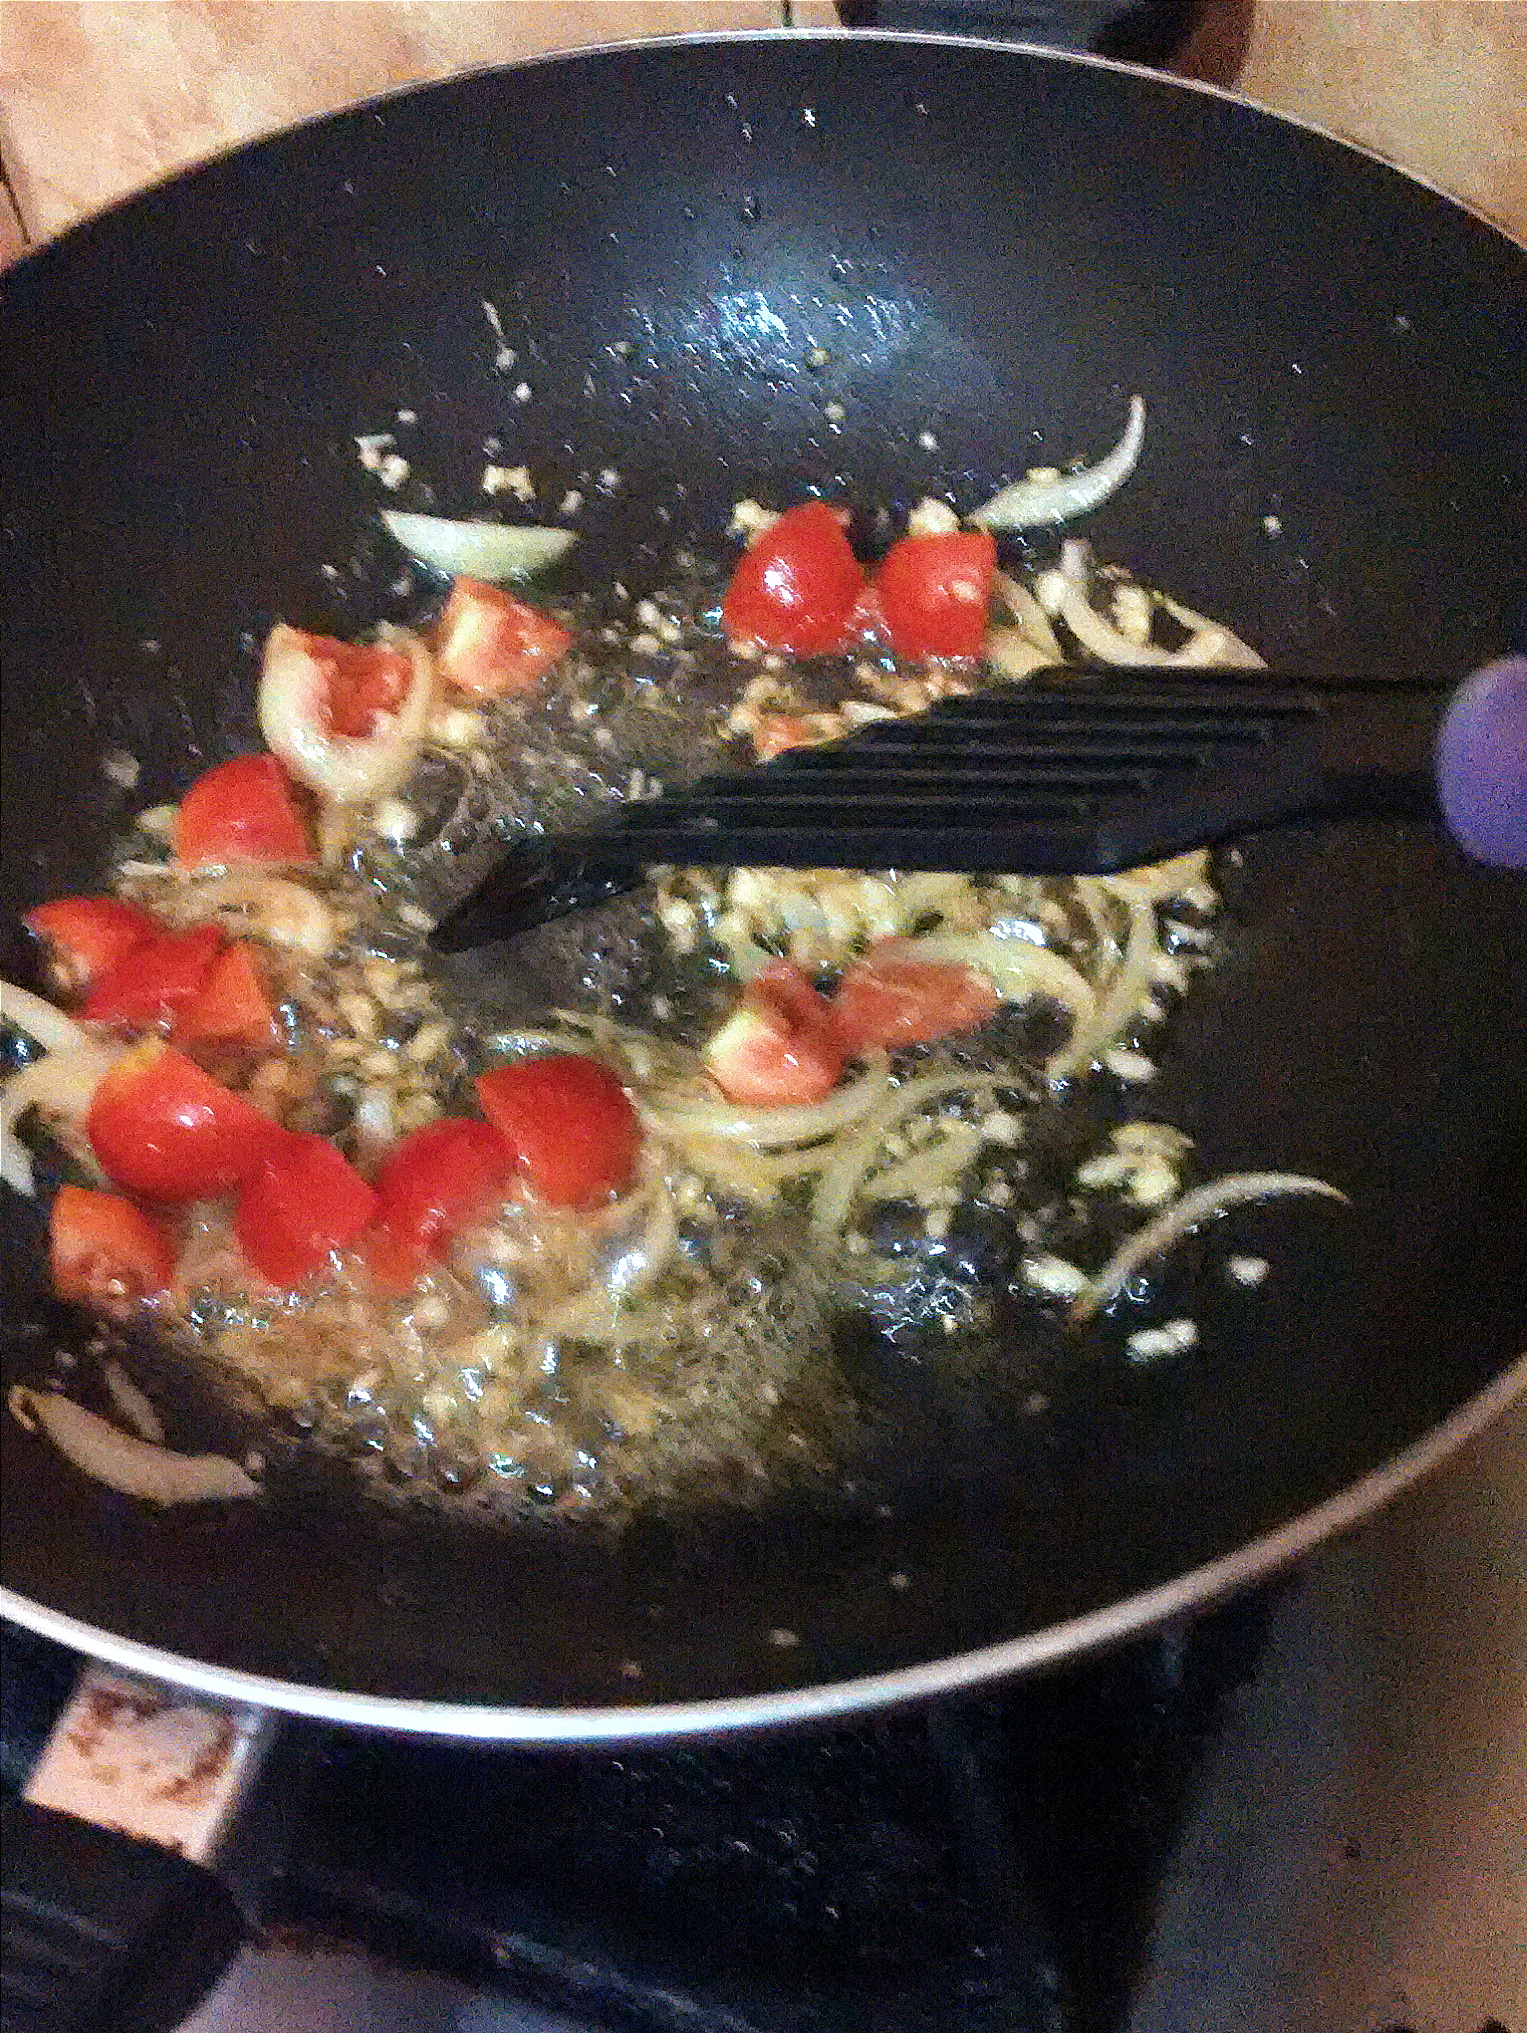
  • Preheat one teaspoon of unsalted butter in a pan over medium heat.
  • Pour in the blended mixture into the preheated pan.
  • Toss all the seasonings in the mixture. Give it a good stir and let it simmer for 10 minutes.
  • Additionally pour in water little by little so it won’t be burnt. Give it a taste and feel free to add more seasonings to your liking
  • Lastly, add in the corn starch and water mixture in the sauce. Mix it all well and wait until it thickens then turn off the heat.
  • DONE!

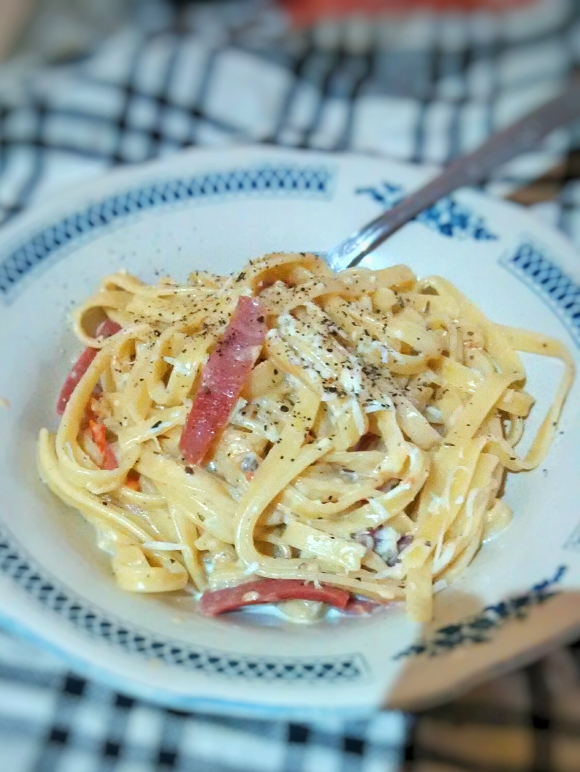
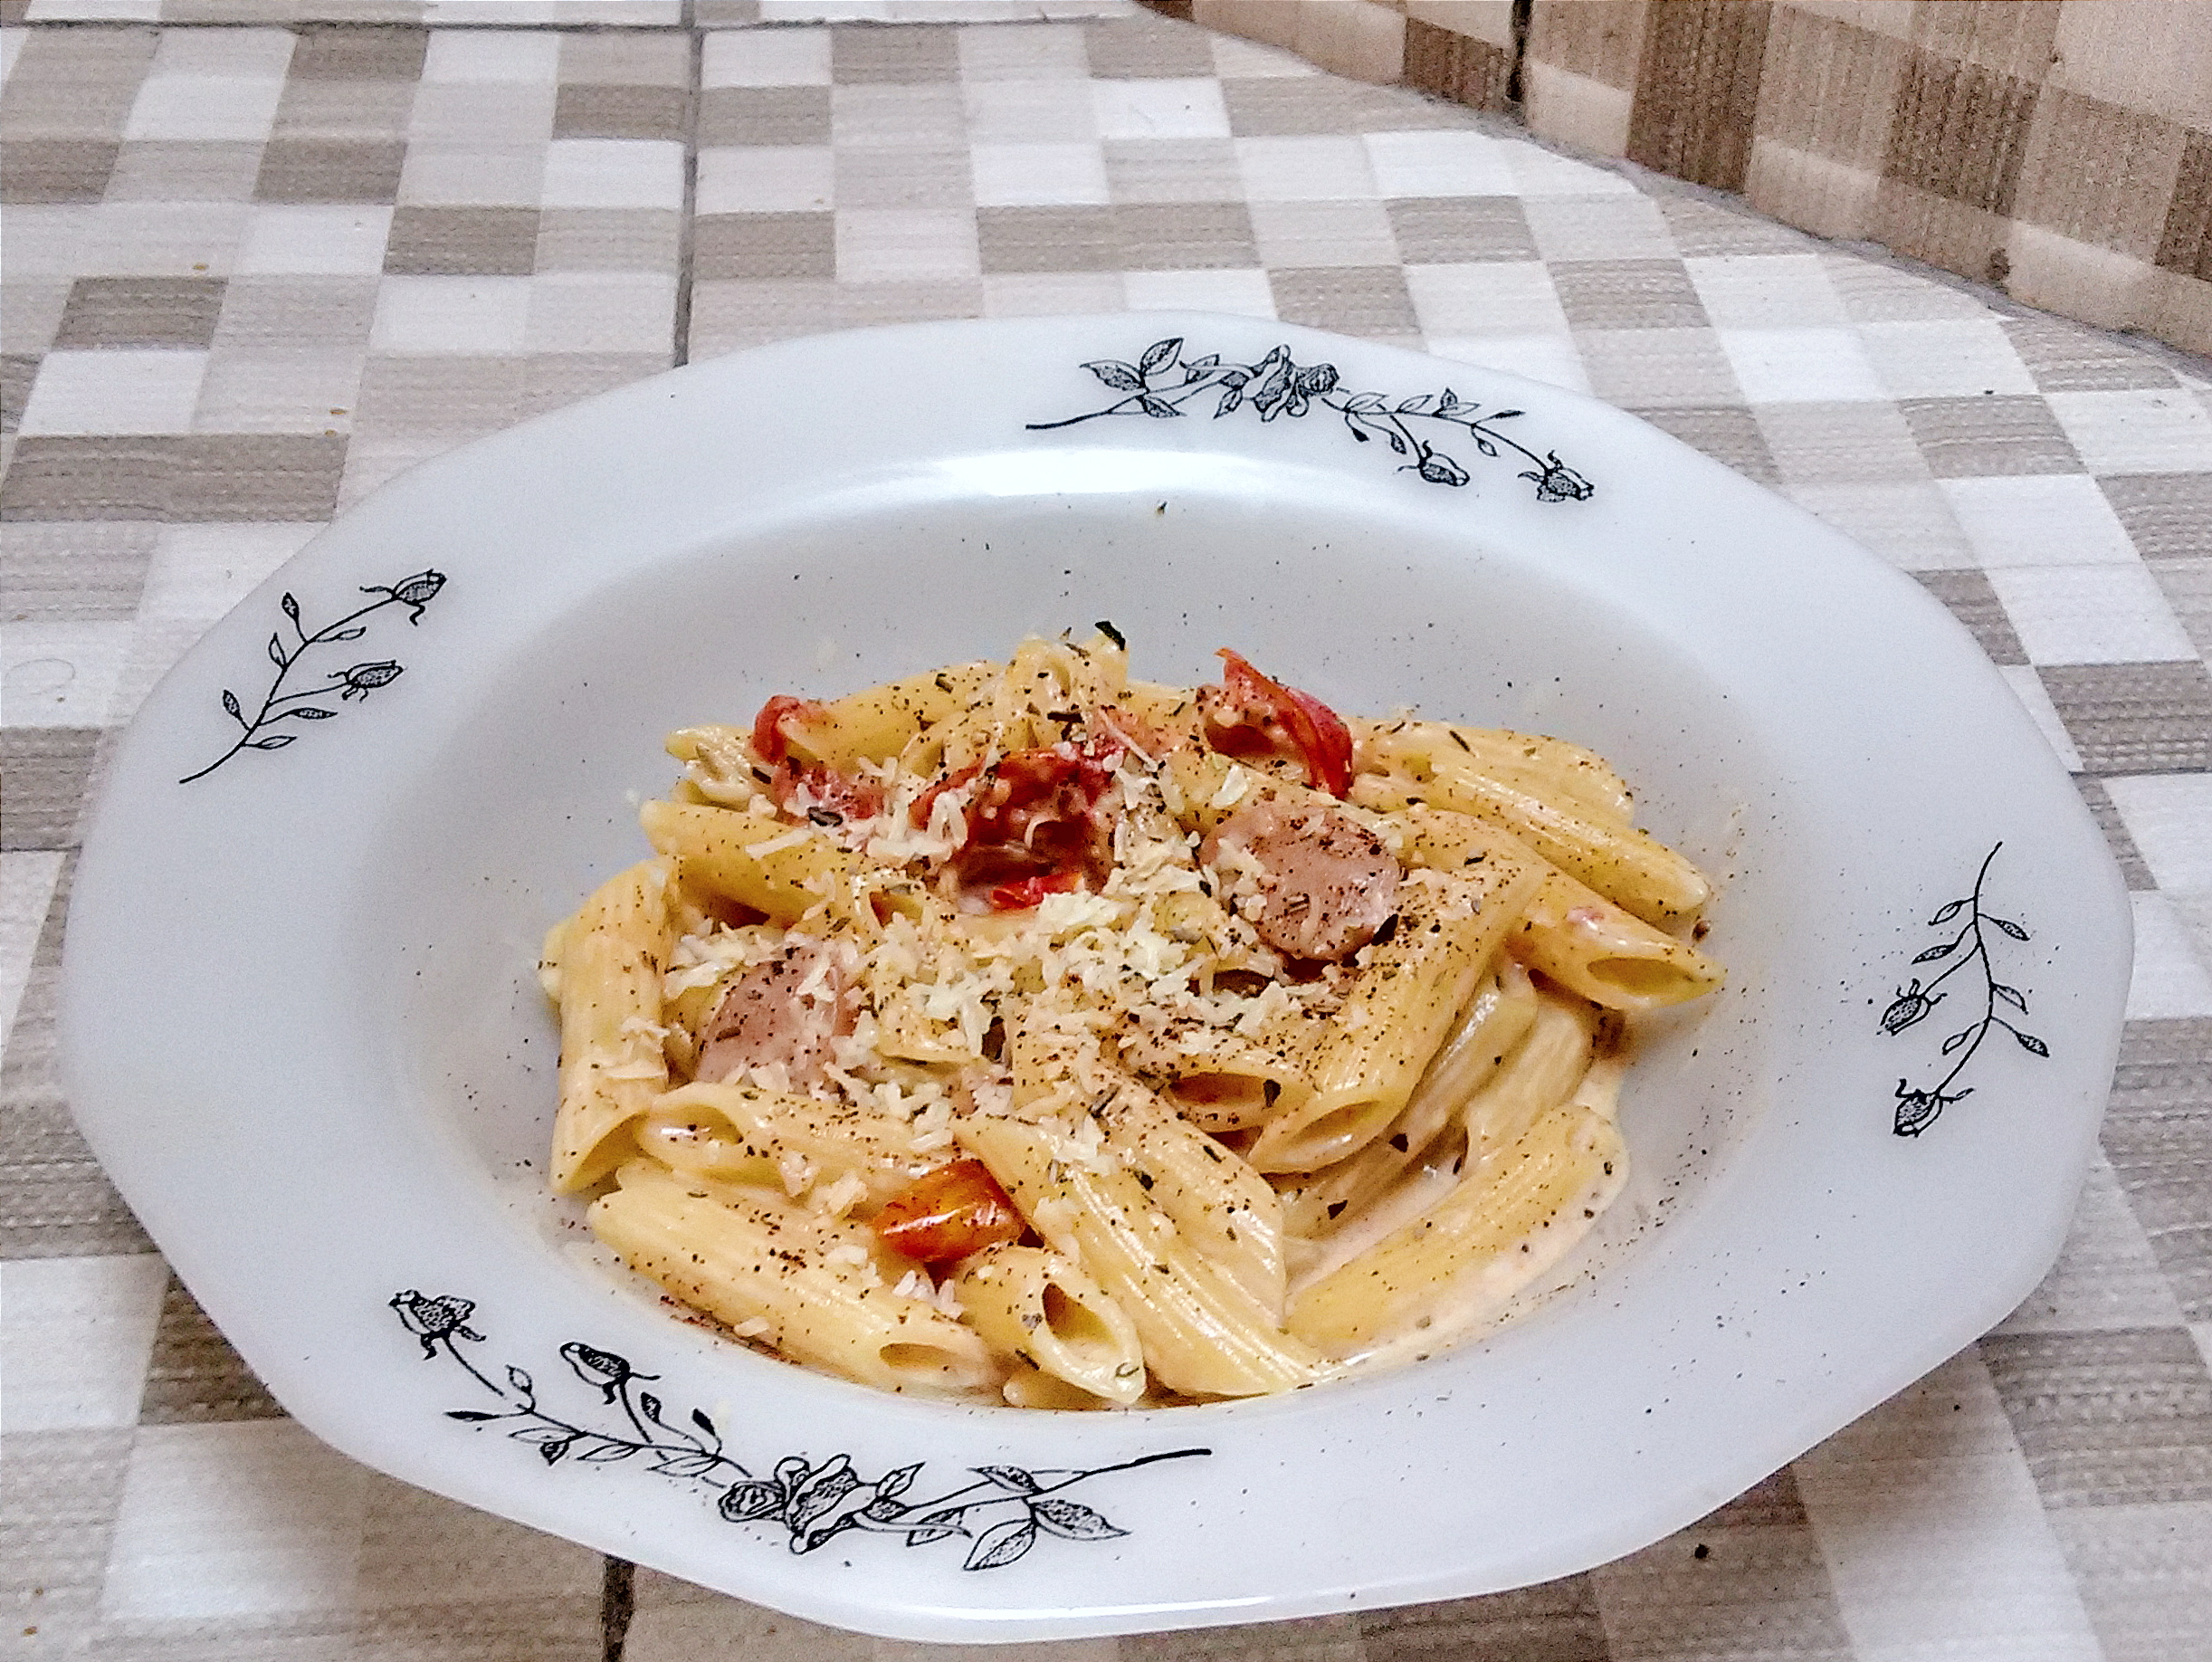
You can actually just eat it as is. But in my case, or like most Indonesian do, we don’t take this dish for granted. We eat it as a main dish along with steamed rice, vegetables and other side dishes. Just like this meal i had for lunch. Yummm!

IMG_20160806_152338_HDR-01-01-01

FAMILY’S FAVORITE FETTUCCINE CARBONARA RECIPE

Processed with VSCO

Processed with VSCO

Yesterday i posted a picture of my homemade Fettuccine Carbonara on my social media accounts. The response was quite frenzy. Pasta dishes have become some kind of comfort food for our family. We enjoy pasta a lot, be it spaghetti, fettuccine, penne, macaroni, fusilli, etc. Whether it is cooked only with garlic & oil, bolognese sauce, carbonara, alfredo, pesto or other cooking style. Since a lot of people asked me about the recipe of yesterday’s Fettuccine Carbonara, i will share it to y’all in this post.

This post also marks my comeback to the blogsphere. It’s been too long i haven’t posted any recipe on the blog due to my hectic schedule the past few months. Now that everything is back to normal, i can spare my time to cook, bake and hopefully write & share a lot more recipe here. Since i didn’t plan to share this recipe, i couldn’t give you the step by step pictures as usual.

So yeah, here’s the recipe:

F E T T U C C I N E  C A R B O N A R A
Serves 6 people (a big fat family of six)

Processed with VSCO

INGREDIENTS

  • 450 gr of Dried Fettuccine. Cooked to Al Dente.
  • 3/4 Onion. Chopped.
  • 3 cloves of Garlic. Chopped.
  • Smoked Beef / Bacon / Sausage as you wish. Cut into the shapes you preferred.
  • 3/4 cup of Full Cream Milk.
  • 1/2 cup of Cheese (Parmigiano Reggiano / Edam / Cheddar / as you wish or whatever available in your cupboard). Grated.
  • 4 Egg Yolks. Whisked together with Milk & Cheese.
  • Ground Black Pepper and Salt. To taste.

DIRECTIONS

  • Cook the pasta. Read the detailed direction of how i cook the pasta here.
  • Put a pan over medium high heat. Drizzle a good amount of olive oil into the pan. Pre heat the oil.
  • Put the sliced smoked beef / bacon in the preheated oil in the pan. Stir it until the edges crisp.
  • Add the onion and cook until translucent.
  • As the onion turns transparent, add in the garlic. Cook it for 30-40 seconds. Watch the fire as the garlic burnt easily.
  • Sprinkle salt and freshly ground paper into the pan. Continue stir all the ingredients and let it cook for at least five minutes over low heat.
  • In a large bowl, add in the egg yolks, grated cheese and milk. Season it with salt and fresh ground black pepper. Whisk the mixture well.
  • Back to the pan. Add in the cooked pasta in the pan. Pour a little pasta water in it. Mix the pasta and the sautéed ingredients well.
  • Turn off the heat. Put out the pan from the stove. Pour in the egg mixture into the pan
  • Bada-bing-bang-boom. Your pasta is ready to serve. You can also add additional grated cheese or a sprinkle of your preferred dry herbs before serving.
Processed with VSCO

Processed with VSCO

Serves it while it’s still steaming hot. In my family, we would even bring the pan on the dining table as soon as it’s ready. Then, we just scoop out the pasta as desired personal portion. Scoop more if there’s any leftover, cuz each one of the family members have different capacity to digest the food.  So, this is totally the dish that calls out the whole family to the dining table. Have a try, Peeps!

BOLU PANGGANG TANPA PENGEMBANG | Basic Vanilla Sponge Cake with No Artificial Improver

Processed with VSCO

Processed with VSCO


We, me & my family, don’t really adopt a healthy lifestyle. We do try our best to look for healthier choices, though. Like this recipe i am about to share. It’s not necessarily healthier than the regular sponge cake with added artificial substances. No chemical improver means more eggs. More eggs equal to higher cholesterol numbers.

Still, there is this different level of satisfaction when you can bake the cake perfectly without additional improver. It’s like when you can manage to keep the house clean & spotless without any helps from a maid or cleaning service. Well, i don’t know if that’s the right comparison. For me personally, that’s what i can think of.

I guarantee that you’ll love this recipe. It is super easy, like seriously, super easy even for amateur baker like me. The prep only takes 15 minutes and it needs 20-25 minutes to bake. The result is super satisfying. The cake is moist, fluffy and raise perfectly (mine was super puffed and even cracked).

BOLU PANGGANG SEDERHANA

Basic Vanilla Sponge Cake with Almond Sprinkled on Top

Ingredients:

  • 6 Eggs. Whites & yolk separated.
  • 190gr Sugar. I use granulated (you may use powdered sugar, no icing sugar)
  • 200gr Low Protein Flour. Sieved.
  • 75ml Cooking Oil.
  • 115ml Luke Warm Water.
  • 1tsp Salt. To taste.
  • 1tsp Vanilla Essence/Paste/Freshly scraped vanilla bean.
  • A handful of Almond. Toasted & sliced.

PhotoGrid_1449142751029

Directions:

  • Beat the egg whites with your electric hand mixer until it forms stiff & firm peak. Start with the lowest speed and gradually increase the speed to the fastest.
Processed with VSCO

Processed with VSCO

  • In different bowl, mix the egg yolks and sugar. Beat the mixture well until it becomes frothy and the color turns pale.
Processed with VSCO

Processed with VSCO

  • Pour in warm water, cooking oil and vanilla essence into the mixture. Beat it with the hand mixer in low speed.
  • Turn off your electric hand mixer. Sieve in the flour and salt. Fold in the flour into the mixture until there is no lump in the batter.

Processed with VSCO

  • The batter is not ready just yet. The last step to complete the batter is to add in the whisked egg whites. Fold in the egg whites into the batter with your spatula. Don’t over mix it as it needs the air in the whisked egg whites.
Processed with VSCO

Processed with VSCO

  • Once the batter completed and beautifully mixed, you can start to grease the cake tin mold. I use 20×10 tin mold. It leaves you very little batter to pour into another tin mold. So, i suggest you to use the 20×20 ones for a single batch cake. Brush the tin vertically with butter (the line will help the cake to raise as well, so they said, dunno for sure, that’s what they always say on tv cooking programs).
  • Pour in the batter into the tin carefully until half full. Tap the tin mold lightly to release the air that’s trapped in between the batter.
Processed with VSCO

Processed with VSCO

  • Don’t forget to sprinkle a handful of toasted sliced almond on top.
  • Bake for 20-25 minutes in a preheated oven at 180°C.
  • Once you can smell the beautiful aroma of a fully baked cake (i believe you are familiar with that smell) from the oven, it’s a sign that your cake is ready. You can double check it by poking the cake with a thin long stick. If there’s no wet batter caught on the stick, your baking is done!
  • Take it out from the oven and leave it to cool down a bit before you can start to slice it.
Processed with VSCO

Processed with VSCO

It’s super easy and the result is super yummy. You won’t believe how puff, fluffy and velvety it is even without any artificial leavening agents and improver. Serve it with hot jasmine tea on a rainy afternoon (well, it’s wet season now here in Indonesia). So simple & delicious cake that suits perfectly with current weather.

Processed with VSCO

Even the leftover batter that filled only 1/5 tin mold is doubled its size & raised beautifully.

CUMI SAUS HITAM MADURA | Madurese Style Squids in Black Ink Sauce (it looks ugly but it tastes heavenly)

Processed with VSCO

Processed with VSCO

I’m back. Feels like forever since my last post. Indonesia is in the transition between dry to wet season and it is just a matter of time when people start to get influenza and stuff. I was one of the few unlucky persons who suffered a bad flu in the early stage. It was hard to gather up my spirits to write again. Thank goodness, now i’m here ready to share another recipe for you.

Today i made a squid dish for lunch. Yes, i’m gonna share another squid dish recipe. Unlike the previous squid, this particular dish has been my favorite since my childhood. There is something about squids in black ink sauce that defines its top position among others. It is packed with rich flavors and the black ink really gives that unique element of taste. Tastes like a symphony of the sea inside my mouth. Hahaha. Sorry for the exaggeration. :-p

Okay, less talking nonsense and more talking about the cooking. Here is the recipe:

CUMI SAUS HITAM MADURA

Ingredients:

Main Ingredients:

Processed with VSCO

  • 750gr of Fresh Squids. Cleaned.
  • 1 Lime. Squeezed.
  • An inch of Ginger. Crush
  • An inch of Galangal / Lengkuas / Laos (a stronger & more pungent version of Indonesian root from ginger family). Crushed.
  • 6 Keffir Lime Leaves. Ripped.
  • 2 (Indonesian) Bay Leaves. Ripped.
  • 8 Bird’s Eye Chilli Peppers.
  • 2 Cayenne Peppers. Sliced Diagonally.

Blended into paste:

Processed with VSCO

Processed with VSCO

  • 7 cloves of Garlic.
  • 8 cloves of (Indonesian) Shallot.
  • 3 Cayenne Peppers.
  • 3 Bird’s Eye Chilli Peppers.
  • 1 Tomato.

Seasonings:

  • A good pinch of Salt. To taste.
  • A good pinch of Sugar. To taste.

Directions:

  • Cleaned the squids from the slimy innards inside the squid’s pouch and on top of its head. Be careful not to burst its ink pocket on the tip of its head. This time i didn’t clean the purple-pinkish outer layer (to keep the rustic feel, because this dish is commonly sold in street hawker stall).
  • Roll and press the lime in your working surface and squeeze the juice over the cleaned squids. Let it sit for 10-15minutes.
  • Put all the paste ingredients in the food processor. Add a spoon of cooking oil and 3 spoons of water to help all the ingredients blend well. Pulse it few times until it becomes slightly smooth paste.
Processed with VSCO

Processed with VSCO

  • In a large iron cast wok, heat up 3 spoons of cooking oil (or any preferred oils) over high heat.
  • Once the oil is hot. Throw in keffir lime and bay leaves in the wok.
  • Almost instantly after that, pour in the paste mixture into the wok. Add in the crushed ginger and galangal. Add salt and sugar to taste. Keep stirring until all the liquid evaporated and changed into darker color.

PhotoGrid_1448187954431

  • When the paste is ready, toss in the squid. Stir it well until the ink burst. Mix them well until all the squids covered in the beautiful black thick ink sauce.
  • Let it simmer for about 6 minutes or so until the squids cooked beautifully.
Processed with VSCO

Processed with VSCO

  • Lastly, throw in the peppers in the wok and give it one last stir.
  • Turn off the heat and Done!

Before serving, you may add a lil bit garnishing with thinly sliced keffir lime leaves (remove the vein, roll, and slice it thinly). Serve it with steaming hot rice sprinkled with fried shallot. I love how all the tastes come together. The savory, rich and thick sauce beautifully covered the tender squids. The sliced cayenne pepper and whole bird’s eye chili peppers give an extra texture and surprise if you are (un)lucky enough to bite that spicy hot chili peppers. The sliced lime leaves will give you that last burst of freshness and pleasant citrus-y aroma. So yummy!

Give it a try, peeps! 😉

Processed with VSCO

Processed with VSCO

PENNE ALL’ARRABIATA CON POLO | Fiery, Spicy Chicken Penne with Shocking Secret Ingredient

Processed with VSCO

Processed with VSCO

I never knew writing could be this fun and fulfilling until i started this blog. I mean, i’ve been so productive these last few days. Actively writing 3 days in a row (with this post, it will be 4 days). Even myself find it very shocking! Like what i wrote on the APPETIZER, i have made 2 blogs before. Both of them ended tragically, i never updated them with new posts.

Does writing a blogpost about my cooking has become my biggest passion? I don’t know. That can be true, but also there is also another reason that i think helps me enjoy this new activity more. There is this continuity in my cooking recently, so the writing becomes easier thing ro do. I made the mango salsa, then i also use mango in my yogurt. After that, i use leftover milk from the yogurt making into creamy sauce for my penne. Today, i still follow that pattern and make another batch of Penne. Mostly use the same main ingredients but with another sauce. In this recipe i am about to share, there will be a shocking sectakesingredient. I hope you keep an open mind about that. Either love it or leave it, that’s your choice.

So here is the recipe:

CHICKEN PENNE ARRABIATA

Ingredients:

Main Ingredients:

  • 150 gr of Penne.
  • 1 tbsp of Cooking Oil. Optional (to be boiled with pasta and prevent them from sticking)
  • A sprinkle of Salt. To taste.
Processed with VSCO

Processed with VSCO

  • 150 gr of Chicken Fillet. Cut into chunks.
  • 1 large Egg.
  • 2 tbsp Cooking Oil. For stirfrying the egg and chicken.
Processed with VSCO

Processed with VSCO

Sauce:

  • 2 tbsp of Extra Virgin Olive Oil.
  • 1/2 medium sized Onion. Chopped.
  • 3 cloves of Garlic. Crushed & chopped.
  • 2 large Tomatoes. Cut into chunks.
  • 1 Cayenne Pepper.
  • 3 Birds’ Eye Chilli Pepper.
  • 2 tbsp of Yogurt. (YES. THIS IS THE SECRET INGREDIENT!)
Processed with VSCO

Processed with VSCO

Seasoning:

  • A pinch of Salt. To taste.
  • A pinch of White Pepper. Freshly ground. To taste.
  • A pinch of Dried Rosemary.
  • A pinch of Dried Basil.
  • A pinch of Dried Oregano.
  • A pinch of Paprika Powder.
  • A pinch of Edam Cheese. Freshly grated as garnish.
Processed with VSCO

Processed with VSCO

Directions:

  • Cook the pasta in the salted water. You can follow the instruction on the package or you can read my previous post here.
  • While the pasta is cooking you can start making the sauce.
  • Prep all the ingredients as instructed above.
  • Heat 2 tbsp cooking oil into the skillet over a medium heat.
  • Crack open an egg into the skillet and make a scramble egg out of it.
Processed with VSCO

Processed with VSCO

  • Stir the chunked chicken fillet in the egg. Continue stirring until the chicken turns into white-ish color.
  • After that, You can either move the now cooked egg & chicken in a plate or keep it in the skillet and move on to the next step.
Processed with VSCO

Processed with VSCO

  • Add in 2 tbsp of EVOO. Once the oil is hot, toss in the sliced onion. Don’t burn it and keep stirring the onion until it translucents.
  • Stir in the garlic for 30 seconds.
  • Toss in the sliced peppers followed by the chunked tomatoes into the skillet.
  • Throw in all the dried herbs.
Processed with VSCO

Processed with VSCO

  • All you need to do now is keep stirring everything and adding the pasta water. Do it over and over again unril the tomatoes break a part and dissolve (not necessary dissolve entirely) into sauce.
  • If earlier you move the proteins into the plate, this is the time you put them back in to the skillet.
Processed with VSCO

Processed with VSCO

  • Lastly, pour the drained Penne into the sauce and give it a stir for one last time and mix them all well.
  • Serve it in a plate. Drizzle the penne with freshly grated edam or parmesan cheese. Done!
Processed with VSCO

Processed with VSCO

It is so easy. Only takes 15-20 minutes to make. The key is keep stirring everything, adding more water, stirring it again until the water evaporates, pouring some more water and stir over and over again. Do that over and over again until the tomatoes dissolve into the sauce consistency you desire. About the yogurt, of course that was just me doing whatever i want. As i told you earlier in this post, you can either leave it or love it. I think i love the result. It ‘s a lil bit creamy, not too spicy (even though i love super spicy food), and it elevates the natural acidity of the tomato. I hope you find this recipe easy to follow. Happy cooking, Peeps! 🙂

Penne with Tomato Cream Sauce | (not so) Healthy but Definitely a Hearty Meal

Processed with VSCO

Processed with VSCO

To be completely honest with you (whoever read this), today’s post is not about my latest cooking experiment. I made this dish few days ago right after i made the yogurt which leave me with 400ml of leftover milk. I actually planned to cook penne  though. I bought the pasta along with the yogurt ingredients. 😛

Well, actually i don’t really cook penne as often as spaghetti or fettuccine. We do all agree that the most well known pasta in the world is spaghetti. Followed by macaroni and fettuccine, i guess. Those 3 are definitely on the top pasta list. Poor Penne did not make it to the list. 😀

Back to Penne. This cylinder shaped pen-like pasta has vertical grid texture on its surface. The texture is great at holding the sauce. I think creamy sauce will be perfect for penne pasta, right? So, let’s cut the crap and just get cooking!

PENNE WITH TOMATO CREAM SAUCE

Ingredients:

Main Ingredients:

  • 200 gr of Penne.
  • 250 ml of Full Cream UHT Milk (because cooking creams are too damn expensive here in Indonesia).
  • 3 small sized Tomatoes (it’s regular tomato, not cherry tomato) cut into chunks.
  • 1/2 small sized Onion. Sliced evenly.
  • 3 cloves of Garlic. Crushed & Finely Chopped
Processed with VSCO

Processed with VSCO

Seasonings:

  • A handful of Grated Cheddar Cheese.
  • 1 tsp of Salt (to taste).
  • 1/2 tsp of White Pepper (to taste).
  • A pinch of each Dried Oregano, Rosemary, Basil and Paprika Powder.
  • 1 tbsp Edam Cheese. Freshly grated (again, because the Parmesan Cheese is too damn expensive in Indonesia. I like this Edam Cheese because it has pungent cheese flavor, great substitute for parmesan).
Processed with VSCO

Processed with VSCO

Directions:

Cooking the pasta:

  • Fill a large deep pan with water and place it over high heat.
  • When the water starts to boil, add salt to taste. Make sure the salt has dissolved before you add in the pasta.
  • Pour in the penne pasta into the hot boiling water. Put a wooden spatula over its surface to prevent the boiling water from overflowing.
  • Stir frequently in the first minutes so the pasta won’t be sticking together. You can also add a lil bit of cooking oil into the pan, if you desire. Always check the pasta and give it stir occasionally every now and then during the whole cooking process.
  • Before draining the pasta, taste it to see if it is cooked to your liking. If i’m not mistaken, i needed around 10 minutes to cook the pasta.
  • I like my pasta al dente and i already did my research through books, blogs and videos about its definition. Some said the literal meaning of that term is ‘bites back’. When pasta is “al dente,” you should feel a slight resistance when you bite into it or cut it with fork. There should also be a thin white vein at the center. To sum things up, you need the pasta to be slightly undercooked…just barely not entirely (just in the thin middle part). But you are free to cook it however you want it.

Making The Sauce:

  • While the pasta is cooking, you may start prepping the ingredients for the sauce.
  • Crush the garlic with the heel of your hand and then chop it finely, put it aside.
  •  Cut the onion in half, slice it evenly and put it aside. Wrap the other half remaining tightly with plastic wrap and keep it refrigerated.
  • Cut the tomatoes into chunks. Just don’t cut it too big to save up cooking time.
Processed with VSCO

Processed with VSCO

  • Cut the sausage diagonally into your preferred size.
Processed with VSCO

Processed with VSCO

  • When the pasta is halfway cooked, you can start making the sauce. Put a butter in a skillet over medium heat.
  • When the butter has melted, toss in the sliced onion and then saute it until translucent.
  • Throw in the garlic into skillet, spread the chopped garlic evenly and let it cook for few second.
  • Put the tomato chunks into skillet. Gently push them with the spatula to help them break apart faster. Continue the pushing and stirring until the onion, garlic and tomatoes slightly dissolve.
Processed with VSCO

Processed with VSCO

  • Add a pinch of each dried herbs, freshly ground pepper and paprika powder then mix it all together well.
  • Keep stirring until the mixture is cooked. When you can smell that great aroma comes out, it’s the right time to put in the sausages and pour in the milk.
  • Let the sauce to simmer. Check your pasta, it should be done by now. Drain your pasta in a colander and leave the water a lil bit (about a soup ladle).
  • Toss in the pasta into the sauce and pour in the pasta water. The pasta water has a lot of starch in it. It can be used as thickening agent.
  • Lastly, add the grated cheddar cheese into the skillet. Continue stirring until the sauce thickens (the cheese helps the pasta water acting as thickening agent).
  • Because the pasta water and cheese are already salty, i think that should be enough salt for the dish. But you can add more salt if you are desired. 😉
  • Turn off the heat and your penne is done.
Processed with VSCO

Processed with VSCO

Scoop out the pasta into serving dish. You can garnish it with another pinch of each dried herbs and paprika powder. Sprinkle some freshly grated Edam Cheese on it. There you have a plateful of hearty meal. Enjoy! 🙂

Squid with Spicy, Sour & Sweet Sauce | So Easy & Refreshingly Delicious!

Processed with VSCO

Processed with VSCO

When it comes to seafood, My Mum has this really high demand list that sometimes we find it really confusing. She only eats dry based seafood (it must be super crispy fried,  she likes the tail part of a fried fish). She hate wet (sauce) based seafood dishes. She does not like fish based processed food at all.

Here in Surabaya we have our very own fermented wet shrimp paste called Petis. We use it in our delicious signature local delicacies. Mostly we make sauce or paste out of it for salad dressing and others but sometimes we stir it in our soup based dishes. Mum loves rujak (veggie salad with shrimp paste & peanut dreaaing) so much but she dislike dip the gorengan (traditional fritters) in Petis Sauce like almost all Surabayans do. She doesn’t like the petis stirred in the Tahu Campur (veggie & beef soup with petis sauce), but she doesn’t mind mix the petis in Lontong Balap (bean sprout & tofu soup). Enough about the petis, the recipe i’m about to share is nothing related to that.

So, today i just learned something new about Mum. She requested this Cumi Asam Manis Pedas (Squid with Spicy, Sour & Sweet Sauce) for dinner. I am shocked. It is because she wanted something that she normaly did not eat (Spicy & Saucy Seafood). She only eats fried calamari. Not even once she ever touched my Squid with Black Squid Ink Sauce (i always make them half & half whenever i cook squid).

To fulfill that shocking demand, i gladly said yes to Mum’s special request. I just grab ingredients in the fridge that i think are suitable for that spicy, sour and sweet taste combination. So here is the recipe for today’s dinner menu:

SQUID WITH SPICY, SOUR & SWEET SAUCE

Ingredients:

Stir-fried:

  • 500gr of Squid (peeled, cleaned, washed crisscrossed, sliced).
  • 1 medium sized of Onion (sliced).
  • 3 cloves of Garlic (crushed & chopped).
  • 1 stalk of Lemongrass (crushed).
  • 3 Lime Leaves (torn apart).
  • Ginger (around the size of your thumb, crushed).
  • 5 Green Pepper (sliced).
  • 2 stalks of Scallions (sliced).
  • 11 bird’s eye chillies.

Blended into sauce:

  • 5 Cayenne Pepper.
  • 3 Bird’s Eye Chilli.
  • 2 Tomatoes.
  • 150 ml of Water.

Seasonings:

  • 2 tbsp of Sweet & Thick Indonesian Sweet Soy Sauce.
  • 1 tsp of Fish Sauce.
  • 1 large Lemon (half for the sauce & half for squid marinade. Squeezed & Zested).
  • A pinch of Salt (to taste).
  • A pinch of Sugar (to taste).
  • A pinch of White Pepper (to taste, freshly grated)
Processed with VSCO

Processed with VSCO

Directions:

  • Start with the squid. It takes up a lot of time and effort to prep. It somehow brings up my inner OCD side in me. LOL.
Processed with VSCO

Processed with VSCO

  • Wash the squids. Peel the outer slimy pinkish skin layer of the squid. Pull the tentacles and the pouch apart. Pull out the bone (the plastic like part) inside the pouch. Clean the slimy innards (eggs and ink pocket) inside the pouch. Cut the eye and another plastic like part inside its mouth. You will get this perfectly cleaned squid as you can see in the picture bellow.
Processed with VSCO

Processed with VSCO

  • Unfortunately your prep job is not done yet. Now you need to poke your knive into the pouch and cut it open wide. Crisscross the inside surfave and then slice it into your desired size. See the picture below for detailed graphic instruction (from top left, clockwise)

PhotoGrid_1446808726334

  • Squeeze half of the lemon in the squid and leave it for at least 15 minutes.
  • Now move on to the sauce. Don’t forget to wash all the ingredients! 🙂
  • Chop all the cayenne pepper, chilli and tomatoes. Put the chopped ingredients into food processor. Pour a little bit of water, blend them all well.
Processed with VSCO

Processed with VSCO

  • While the sauce is blending, start chopping all of the stir-fry ingredients & heat 4 tablespoon of cooking oil in a skillet over a medium heat.
  • Slice the onion, throw it in the hot skillet. Stir it until translucent.
  • Crush & chop the garlics. Stir it in the skillet and keep stirring until they slightly caramelized.
  • Crush the white part of the Lemongrass and tie it around the edges. Toss it in the skillet and give it another stir.
  • Tear apart the lime leaves and put it in the skillet.
  • Peel the ginger with your spoon and then crush it with the back of your knive. Throw it in the skillet and stir all the ingredients until that beautiful aroma comes out.
Processed with VSCO

Processed with VSCO

  • Pour in the sauce into the skillet. Do not waste the sauce, i know there must be some lumps stuck in the food processor. That’s why earlier i asked you to pour the water just a lil bit. Now pour the rest of the water into the blender and push the pulse few times. Now pour the liquid into the skillet.
  • Add in the lemon zest into the sauce.
Processed with VSCO

Processed with VSCO

  • Let it simmer for a few minute. When the sauce starts to thicken, start to stir again. Keep stirrinh it all well until the sauce thickens more and the color getting darker.
Processed with VSCO

Processed with VSCO

  • When the sauce is ready, pour in the squids all together. Make sure that the squids spread evenly in the skillet and covered evenly in that beautiful sauce. It only need 6 minutes for the squid to be cooked properly (in my case, depends on how thick and big you cut the squid). Don’t overcook it unless you want that rubbery texture in the squid.
  • Don’t forget to toss in the sliced green peppers, scallions and whole chilli peppers one minute before you turn off the stove. You need them to be still fresh when you eat it and plus it adds another texture in the dish.
  • Pour in the juice from the half of the lemon into the sauce. Give it one more stir and then turn off the heat.
Processed with VSCO

Processed with VSCO

Our “Squid with Spicy, Sour and Sweet Sauce” or here in Indonesia We call it “Cumi Asam Manis Pedas) is ready. Eat it with steaming hot white rice. I’m sure this dish is definitely a “Rice Stealer”. It will call for more rice. Just remember to watch your rice consumption (it has high glukose, especially when it is steaming hot).

Processed with VSCO

Processed with VSCO

But whatever. It is YUMMM! Selamat Makan! 🙂

Creamy Homemade Yogurt | Just Because I Can and I Have Time To Make It

Processed with VSCO

Processed with VSCO

There are rows of ready to eat yogurt in the dairy products aisle in the supermarket. So why bother making your own homemade yogurt?

Just because i can and i want and also i have plenty of time to make it! :p

To be honest though, it is also because i have this inner cheapskate side in me. So if there were more economical options available, i would most likely choose them. As long as i can save a little more money, i am willing to do that if it is possible.

Well, actually, this is my second attempt making homemade yogurt. My first experience was fine. The result was not really what i expected. My final product was a lil bit slimy (could not set properly). The taste was very good though, not too sour and a lot more creamier than the store bought yogurts. Because of that slight failure, i wasn’t really satisfied with that and always wanted to make another batch. Well, since i just started this cooking blog, and my everyday life filled with wonders of what would i post on the blog. I think it is the perfect time ro re-do that challenge again. The homemade yogurt challenge. LOL

CREAMY HOMEMADE YOGURT

Adaptation fromJust Try & Taste

Ingredients:

  •  600 ml Milk (I use Full Cream UHT Milk).
  • 3 tbsp (heaping) Fresh Plain Natural Yogurt (acting as the starter).
Processed with VSCO

Processed with VSCO

Equipment:

  • Tupperware’s Lunch Box (or any tightly sealed food storing box). You can also use jars.
  • Laddle.
  • Spoon
  • Clean Tablecloth.
  • Make sure that any equipment that will be directly contacted to the milk and yogurt are sterilized (boil it in a hot boiled water, if you use plastics make sure they are food grade products).
Processed with VSCO

Ignore the different tupperware color. I forgot to take a picture of my actual yogurt container during the sterilization. LOL.

Direction:

  • Boil water in a large pan. Once it bubbly, put in your equipments into the pan and then turn off the heat. Let it soak for 5 minutes.
  • Pour the milk into a saucepan over medium heat. Once the milk starts to boil, turn down the heat into low heat and let the milk simmer for minimum 5 minutes.
  • After simmering for 5 minutes, remove the saucepan from the stove and let it cool. For a better and fasten thw process, you may give it a cold bath. Don’t let the milk cool down too much, make sure the temperature is still comfortable warm.
  • Scoop out 3 tablespoons of plain yogurt. Place it inside the container.
Processed with VSCO

Processed with VSCO

  • Pour the-now-warm-milk into the container one laddle at a time. Gently stir the milk and yogurt mixture. Make sure that the yogurt is not entirely dissolve in the milk. Over stirring will kill the good bacteria that makes your yogurt.
Processed with VSCO

Processed with VSCO

  • Put the container lid on. Close it thightly.
Processed with VSCO

Processed with VSCO

  • Wrap a square napkin around the container until it all covered.
Processed with VSCO

Processed with VSCO

  • Keep the wrapped container in a warm place for at least 7 hours. The longer you keep it in warm place, the more sour taste you get. You can place it by window (in the shade, not in the direct sunlight spot). Also, you can place it inside your laundry basket beneath your laundry (i did this). The other way is to put in the beverages’ container (without wrapping it in napkin), and pour a warm water (don’t let it submerge, just beneath the lid border).
  • After 7 hours or so, unwrap the package and put the container in the coolest place in your fridge (do not pur it in the freezer!)
Processed with VSCO

The consistency after being placed in warm place.

  • Keep the container in the fridge for at least 7 hours or so. Check it to see if it already sets into the consistency you desire. For me this consistency is good enough. It is thick, creamy and not slimey. Yumm
Processed with VSCO

Processed with VSCO

So that is my second attempt making homemade yogurt which turns out with great result. I like how creamy, not too sour and fresh the yogurt is. I think it could be better if i use fresh farm milk instead of UHT Milk. The thing with UHT Milk is that it has slightly burnt taste, unlike the fresh one. But i’m very satisfied with this batch yogurt. I made a cup of Mango Lassi out of it right away. Super easy recipe! Just put the diced fresh mango into food processor. Pulse them few times and then mix it well with the yogurt. Done!

Here’s the pic of my Mango Lassi:

Processed with VSCO

Processed with VSCO

Sambel Pencit | Easy, Spicy and Fresh Indonesian Style (Unripe) Mango Salsa

IMG_20151010_061747_HDR_1446375536016

Mango Season is Coming!

Yaaaaaaaaaaasssss beibeh.

Here in Indonesia we don’t only have dry and rainy season. We have all kind of tropical fruit season throughout the yar. Mango season is definitely one of the most awaited seasons of all. Lucky us, we happen to have two mango trees in our front yard. As you can see on the picture we’ll harvest a lot of mangoes this season! This is actually also surprising for us. Our trees don’t usually fruit this much. These mango are beyond organic-home grown-best mango we can get!

So,

This afternoon we decided to have humble food as lunch. Some fried tempeh (indonesian fermented soybean cake), tofu and chicken on steaming hot white rice. We need something to complement our humble dish with something that can elevate the taste of our lunch menu. The best one true pairing and perfect condiment for any kind of Indonesian Food is undoubtedly Sambal Sauce. Sambal is an Indonesian traditional spicy sauce originated from the island of Java. This traditional sauce is typically made from chili pepper and variation ingredients such as shrimp paste, tomato, shallot, garlic and so on. The ingredients may differ depend on what kind of sambal we make. However it shares one common thing: IT IS SPICY!

SAMBAL is like the staple condiment in Indonesian household. We like our food spicy. Even some of the dishes we cook and eat are not all spicy, we can simply just add sambal in it to give that extra hot kick! We have wide variety sambal sauce to name. Each region has its own distinct sambal sauces.

Since all we got for lunch was fried dishes, we need something fresh to balance it out. What is more fresh than a Sambal Pencit (pencit is un-ripe mango) which the main ingredient is plucked just before being processed. The tangy slightly sweet and spicy taste of the sambal will cut all the greasiness of the fried tempeh, tofu and chicken. Without further a do, i’ll share you the recipe of this amazing sambal sauce. Hope you’ll enjoy it.

Processed with VSCO

Processed with VSCO

SAMBAL PENCIT

Indonesian Style Unripe Mango Salsa

Ingredients:

  • 1 unripe mangoes. Finely julienned or grated(i use 2 kinds of mangoes, half and half).
  • 21 birds’ eye chili (super spicy. Indonesian loves spicy food!)
  • 3 cayenne peppers
  • 2 cloves of garlics.
  • 5 cloves of shallots.
  • 1 tbsp of Terasi (Indonesian dried fermented shrimp paste) pre-fried or pre-roasted.
  • A pinch of salt to taste.
  • A pinch of sugar to taste.
  • 2 tbsp of heated cooking oil (or any flavorless oil you prefer)
Processed with VSCO

Processed with VSCO

Processed with VSCO

Processed with VSCO

Directions:

  • Chopped all the ingredients (chili, pepper, garlic and shallot). It will help you a lot. So, you don’t need to do too much grinding on the next step.
  • Put all the chopped ingredients into the mortar.
  • Add salt, sugar and terasi to taste.
  • Ground all the ingredients and mix it well with your pestle.
  • Once all the ingredients are mixed well, pour the hot oil in it.
  • One last step is put the julienne mangoes in your sambal. Give it a mix one last time until each stick of mango well coated in your spicy sambal!
  • Done.
Processed with VSCO

Processed with VSCO

It’s easy

It is super fresh.

Super flavorful!

Tangy, sweet, spicy, salty at the same time.

It’s an exploxion of taste in your mouth.

Processed with VSCO

Processed with VSCO

Our humble & unpretentious lunch.

So yummy and easy.

See ya on the next blog post and the next recipe. Hopefully i can post more often.

Thank you for stopping by and reading my blog post. 🙂

Easy Crispy Outside / Springy & Soft Inside CIRENG Recipe!

Processed with VSCO

Processed with VSCO

There’s always that time when we crave for our childhood snacks. You know what i mean. Those steet snacks we bought from bapak or ibu kakilima outside our school wall. They were not always healthy but heck yeahhh they were undoubtly tasty….(thanks to the MSG family LOL).

So this afternoon i just had a sudden craving for either Cireng or Cilok. Both are made of Aci/Kanji/Tapioca. Both are tasty. But as we all agreed…something fried are better than something boiled, right? Double the sin. Double the calories. Double deliciousness. So CIRENG it is!

I randomly googled for the recipe and actually found some helpful recipes. But then i decided to combine what i would want to put and what not into my cireng (based on my preference and what i have in the fridge). So, here is my finalized recipe:

Dry Ingredients:

  1. 150 gr. Tapioca Flour
  2. 2 Cloves of Garlic. Finely Crushed.
  3. 2 Stalks of Scallion. Finely Chopped.
  4. 1 1/2 tsp. Salt (to taste).
  5. 1/2 tsp. Sugar (to taste).
  6. 1 tsp. Shrimp powder. (I use leftover KOYA Powder…koya as in the SOTO condiments, made of ground shrimp crackers & fried garlic chips. You can also use finely ground toasted dried shrimp).

Starter Ingredients:

  1. 50 gr. Tapioca Flour
  2. 150 ml. Water.

Step by step:

  1. Put all the dry ingredients into a large bowl and mix it well. Make sure that the salt are spread evenly! 😉
  2. To make the starter, pour water into a saucepan. Put the tapioca into the pan and stirr it until it dissolves.
  3. After the tapioca liquid mixed well, put it on the stove over a small heat. Stirr the liquid until it thickens and turns into ‘paper glue’ like consistency. Turn off your heat and put the starter into the dry ingredients bowl immediately.
  4. Pinch & knead the starter and the dry ingredients together until all the dry ingredients sticks well in the starter.
  5. Attention: the starter is so hot so you need to be careful when you mix it. Also, don’t over knead it for it can be a tough dough, you don’t want that! You want crispy outside, springy inside CIRENG…you don’t want a fried white rubber!
  6. After everything mixed well into a beautiful dough, pull it into your preferred size. Shape it into circle.
  7. Put oil into a deep fry pan over a medium heat.
  8. Fry the dough until the skin looks white and crisp. Your CIRENG is DONE!

Spicy Black Soya Dipping Sauce

  1. 2 tbsp. Sweet & Thick Indonesian Black Soya Sauce.
  2. 6 bird eye chili pepper finely chopped.
  3. 1 tsp. Fried shallot.
  4. A drizzle of lime juice.
  5. 1/2 tsp. Water.

Mix all the ingredients well. Done!

You are ready to enjoy the Cireng. The good thing about cooking your own ‘street snack’ is that you can control everything. You know what you put inside the food. You make sure about its hygiene and cleanliness. It is as tasty (if not better) but not as guilty as the one you bought on the street.

Selamat mencoba.

Hopefully this recipe is helpful ya.